Introducción
Buenas, en este post vamos a instalar y configuar Icinga2 para hacer un monitoreo de las máquinas que tenemos en OpenStack y OVH. La instalación la haremos en Dulcinea.
Icinga es un fork de Nagios creado en 2009 por un grupo de desarrolladores de la comunidad. Este intenta mejorar a Nagios en sus características y componentes, entre ellos se encuentra una interfaz web más moderna y los conectores adicionales para bases de datos.
Cabe destacar que Icinga2 es compatible con Nagios y sus plugins.
Nosotros vamos a usar la actual versión del programa Icinga2.
Características principales
- Monitorización de servicios de red (SMTP, POP3, HTTP, NTP, Ping, etc..).
- Monitorización de componentes de red (switches, routers, etc..).
- Notificación a usuarios por correo electrónico.
- Nivel de alertas.
- Dos interfaces web opciones (Icinga Clasic UI e Icinga Web).
Instalación Icinga2
Actualizamos nuestra máquina e instalamos los paquetes necesarios:
sudo apt update

sudo apt install -y apt-transport-https wget gnupg
Descargamos la clave del repositorio de icinga para poder instalar desde su repositorio:
wget https://packages.icinga.com/icinga.key

sudo apt-key add icinga.key
Añadimos los repositorios de Icinga:
sudo su -

echo "deb https://packages.icinga.com/debian icinga-buster main" > /etc/apt/sources.list.d/icinga.list

echo "deb-src https://packages.icinga.com/debian icinga-buster main" > /etc/apt/sources.list.d/icinga.list
Volvemos a actualizar e instalamos Icinga2 y sus plugins:
sudo apt update
sudo apt install icinga2 monitoring-plugins
Reiniciamos Icinga2:
sudo systemctl restart icinga2
Instalación Icingaweb2
Para que se puedan almacenar y mostrar los datos recolectados en Icingaweb2, tenemos que tener una base de datos, nosotros vamos a usar MariaDB, también tendremos que instalar un conector para la base de datos:
sudo apt install -y icingaweb2 icingacli mariadb-server icinga2-ido-mysql
Creación bases de datos
Entramos en la base de datos y creamos el usuario, las bases de datos necesarias y asignamos permisos:
sudo mysql -u root -p

> CREATE DATABASE icingaweb2;
> GRANT ALL ON icingaweb2.* TO icinga@localhost IDENTIFIED by 'icinga';
> CREATE DATABASE icingaido;
> GRANT ALL ON icingaido.* TO icinga@localhost IDENTIFIED by 'icinga';
> FLUSH privileges;
> quit
Importamos el esquema de IDO-Mysql para que Icinga use al escribir los datos de monitorización recopilados:
sudo mysql -u root icingaido < /usr/share/icinga2-ido-mysql/schema/mysql.sql
sudo systemctl restart icinga2
Instalación apache2
Instamos también apache2:
sudo apt install apache2
La interfaz web utiliza un conector para el envío de comandos al servidor. Para ello habilitamos dicha función:
sudo icinga2 feature enable command
Añadimos el usuario nagios creado previamente al instalar icingaweb2 al grupo www-data:
sudo usermod -a -G nagios www-data
Instalación en navegador
Generamos un token para poder instalar Icingaweb en nuestra máquina:
sudo icingacli setup token create
icingacli setup token show
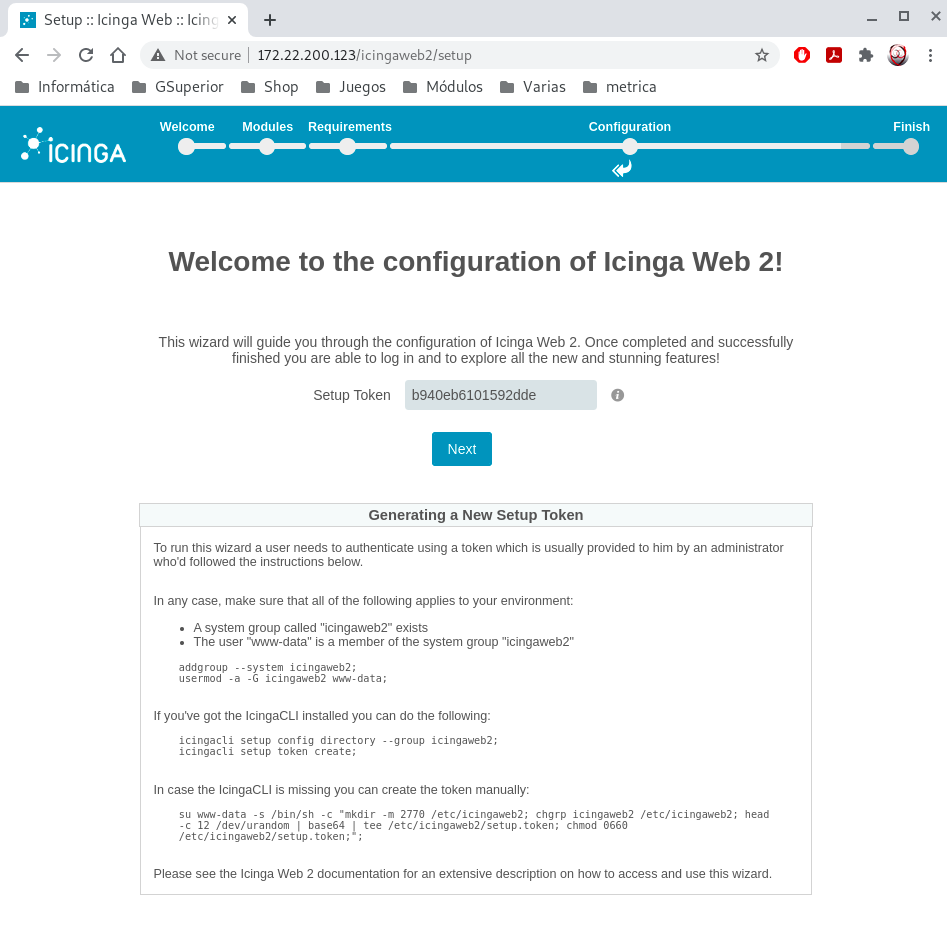
Y comenzamos la instalación ingresando en la IP de nuestra máquina y poniendo el token generado anteriormente:
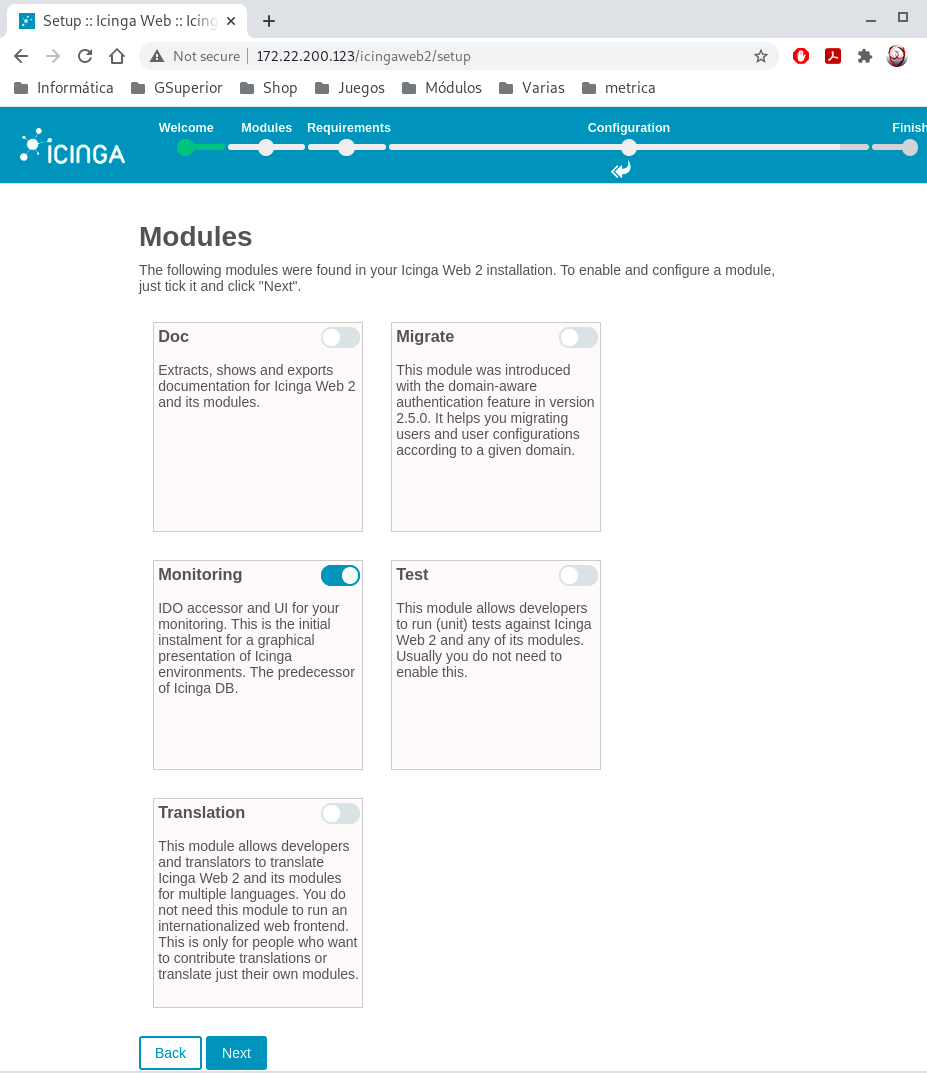
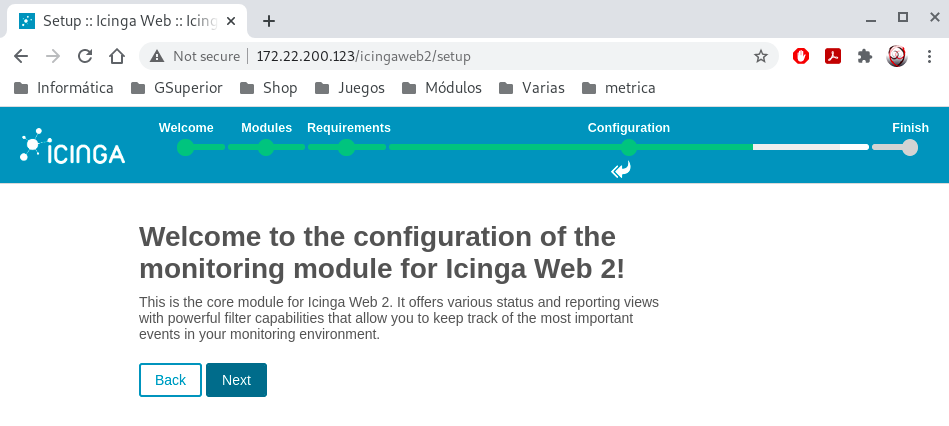
Le indicamos que instalaremos el módulo de monitorización:
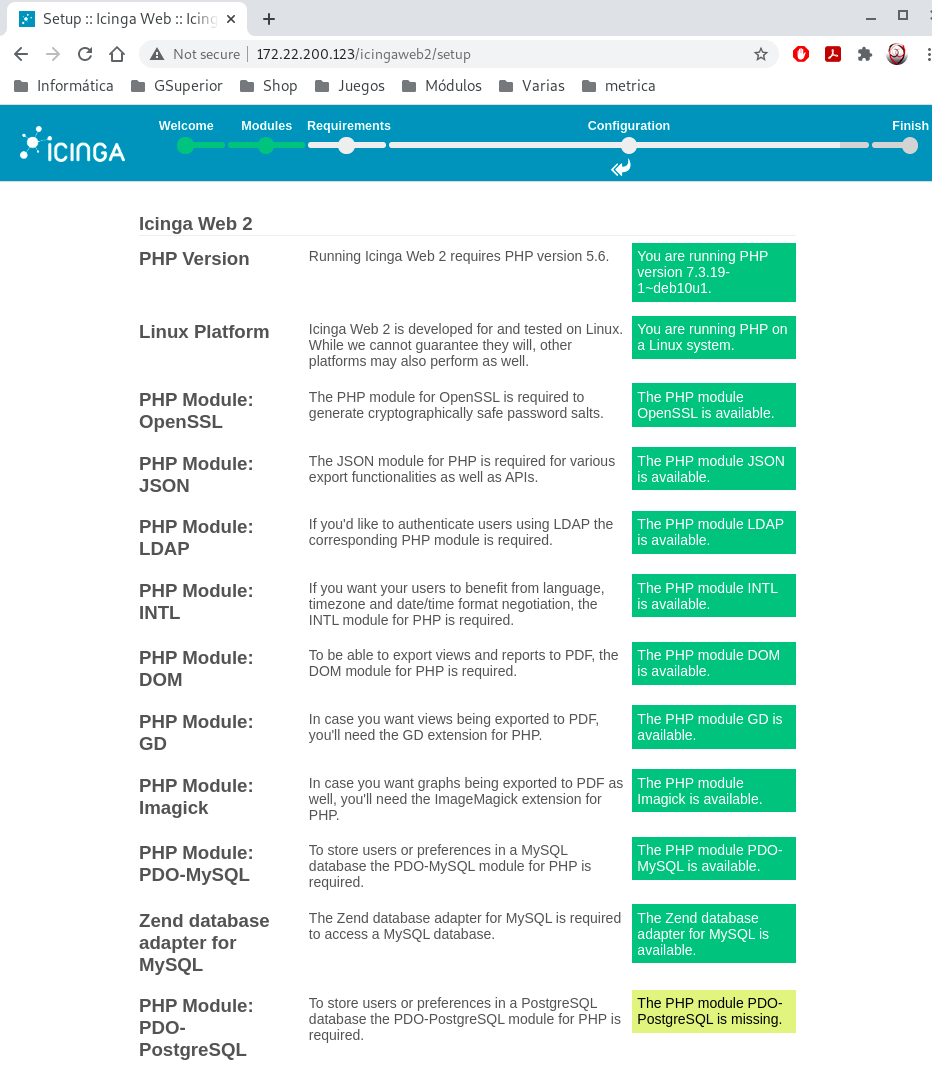
Vemos si tenemos que instalar algún componente más que sea necesario, nosotros por ejemplo los de postgreSQL no los instalaremos:
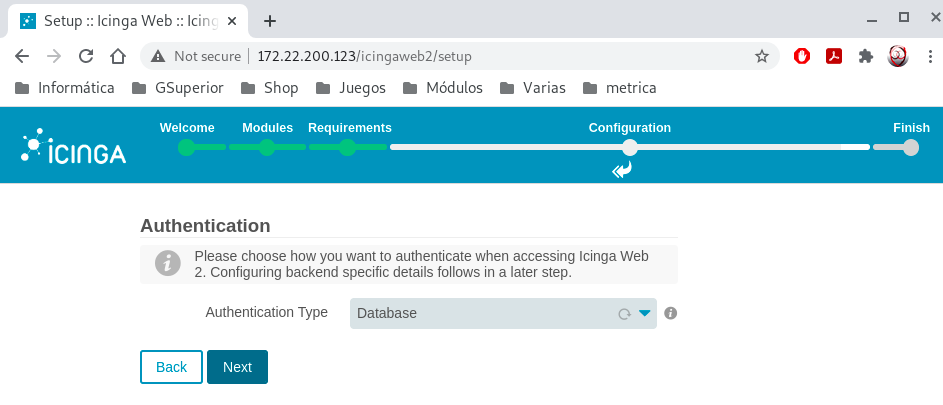
Indicamos que la autentificación para ver los datos será mediante la base de datos :
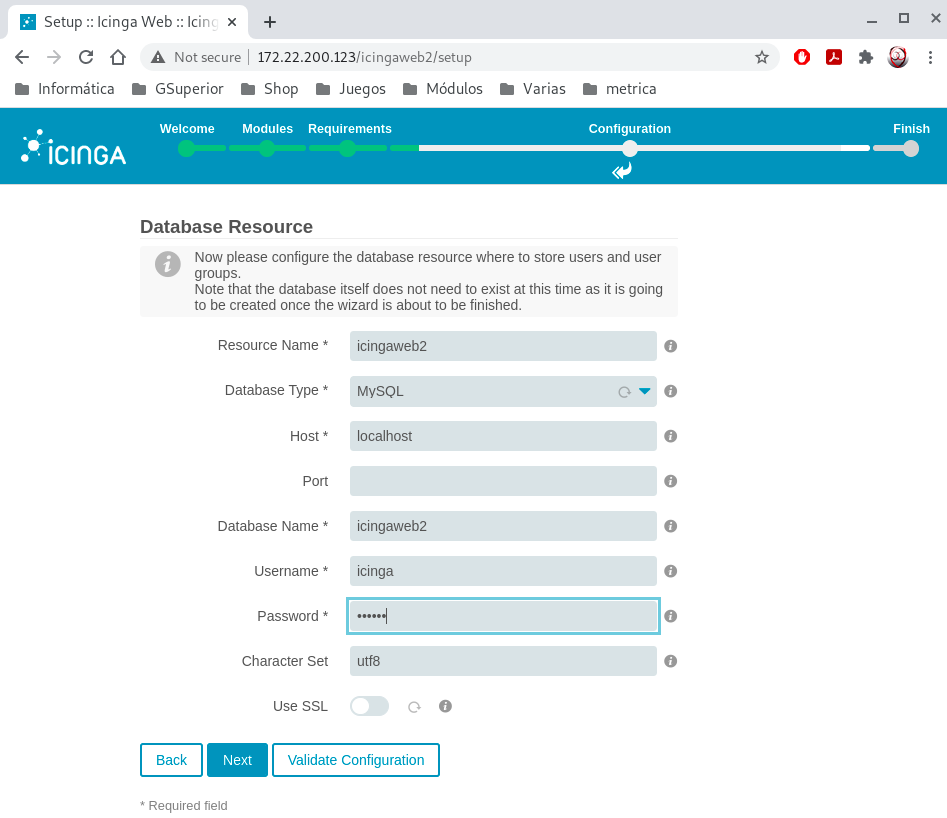
Seleccionamos la base de datos que creamos anteriormente para almacenar la configuración de usuarios y grupos de icinga e introducimos las credenciales para la base de datos de icingaweb2:
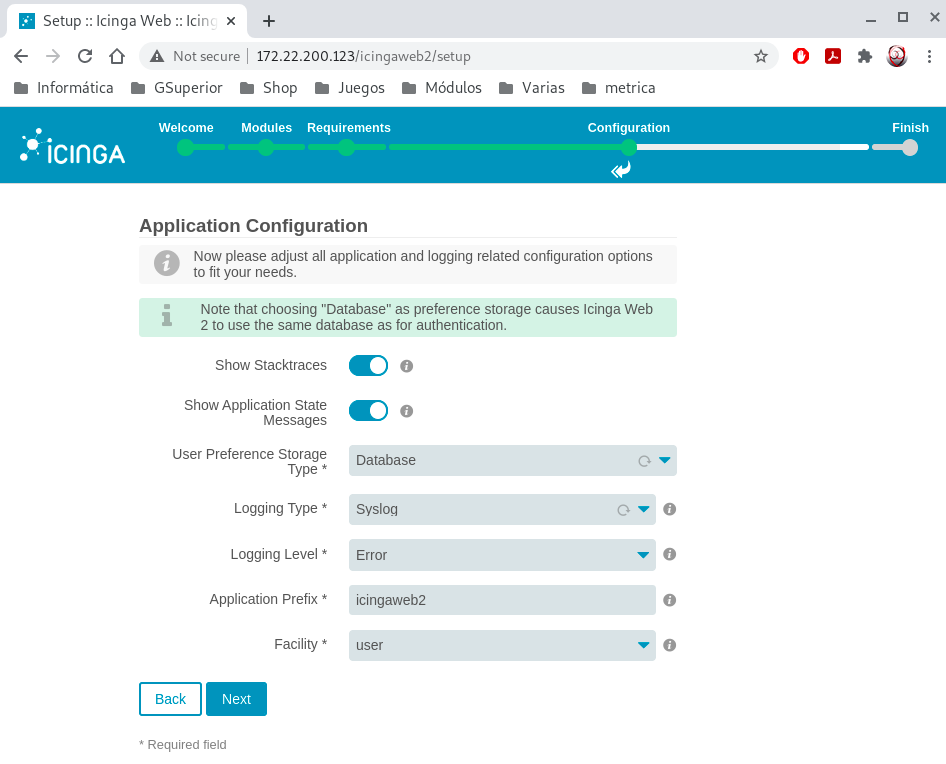
Dejamos por defecto:

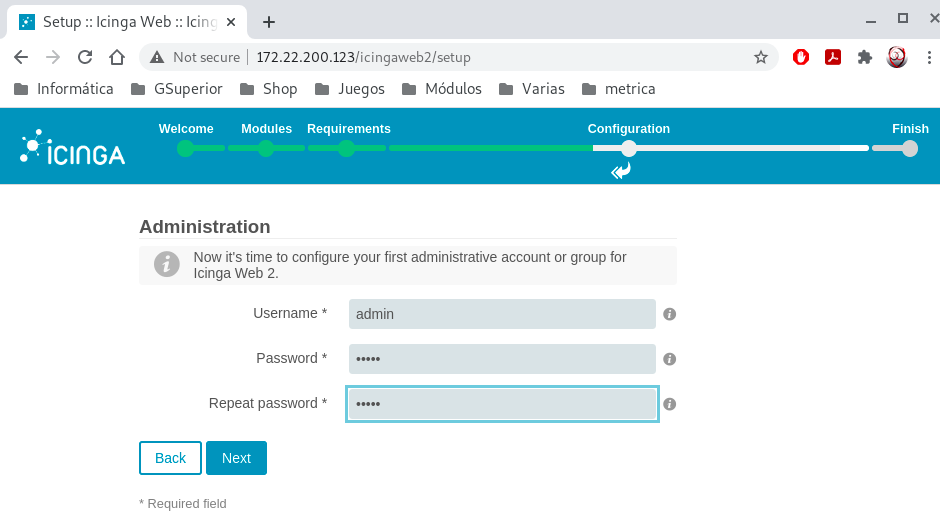
Ponemos las credenciales para el acceso al panel de administración, en nuestro caso pondremos admin en usuario y contraseña:
Dejamos por defecto:
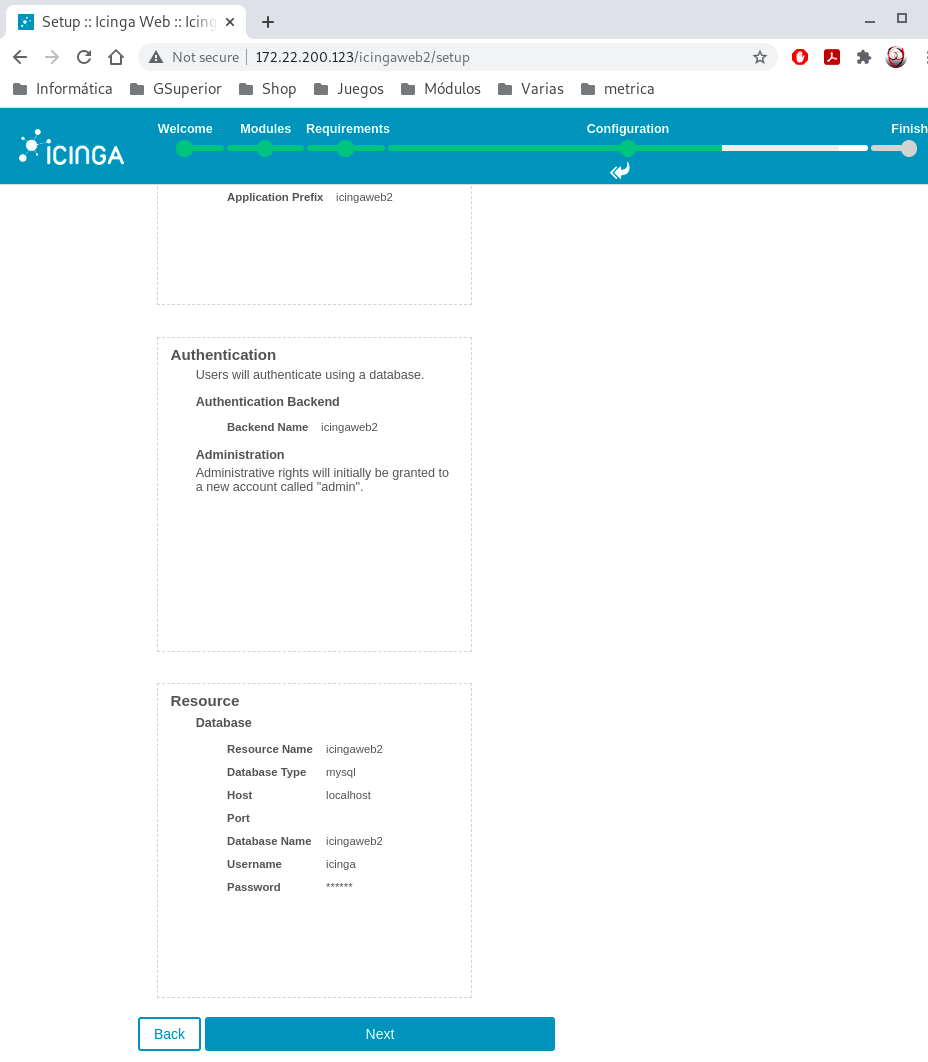
Confirmamos los datos tras una revisión:
Ahora nos vamos a la máquina y añadimos en la configuración del conector para la base de datos:
sudo nano /etc/icinga2/features-available/ido-mysql.conf
La información necesaria para que funcione el módulo IDO:
library "db_ido_mysql"

object IdoMysqlConnection "ido-mysql" {
  user = "icinga",
  password = "icinga",
  host = "localhost",
  database = "icingaido"
}
Y reiniciamos Icinga2:
sudo icinga2 feature enable ido-mysql
sudo systemctl restart icinga2
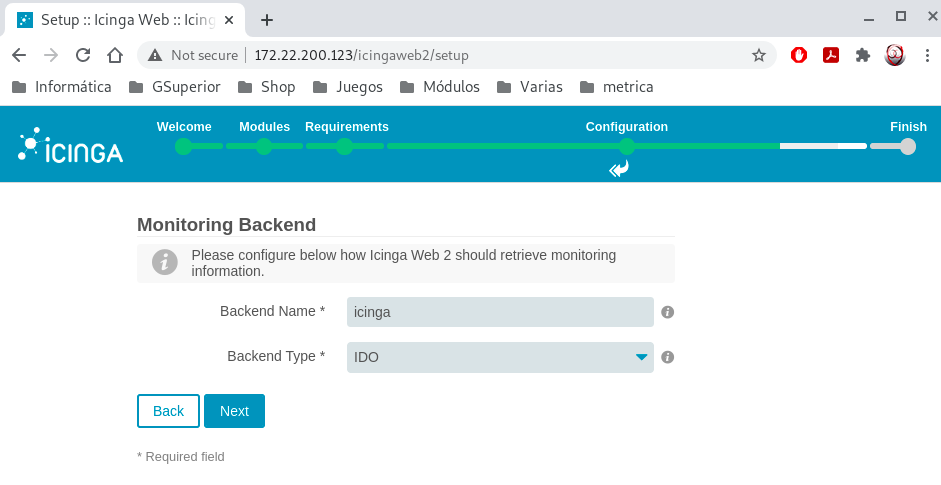
Volvemos a la configuración en el navegador y pulsamos en siguiente:
Ponemos el tipo de base de datos que va a ser la base de datos en la que se guardarán los datos de monitorización:
Rellenamos las credenciales de la base de datos Icingaido creada anteriormente:

Seleccionamos Transport Type en Local Command File:
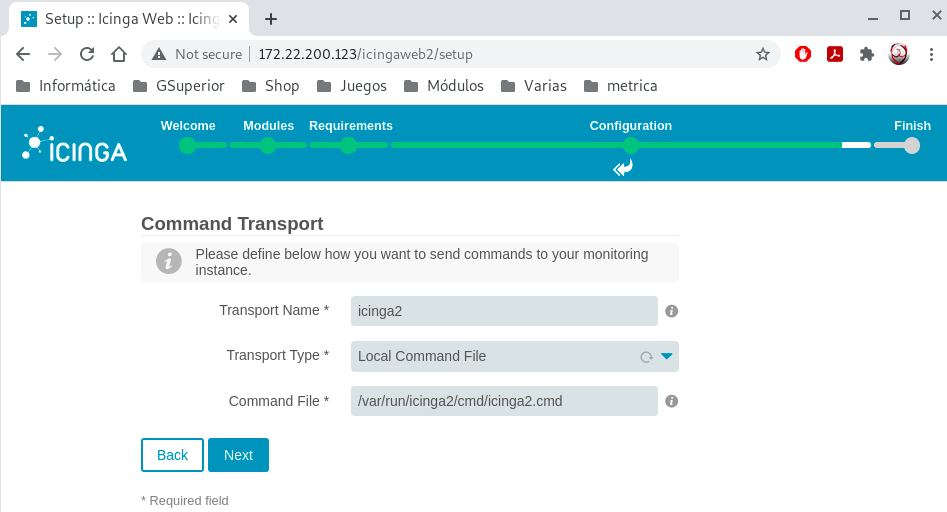
Dejamos las variables por defecto:
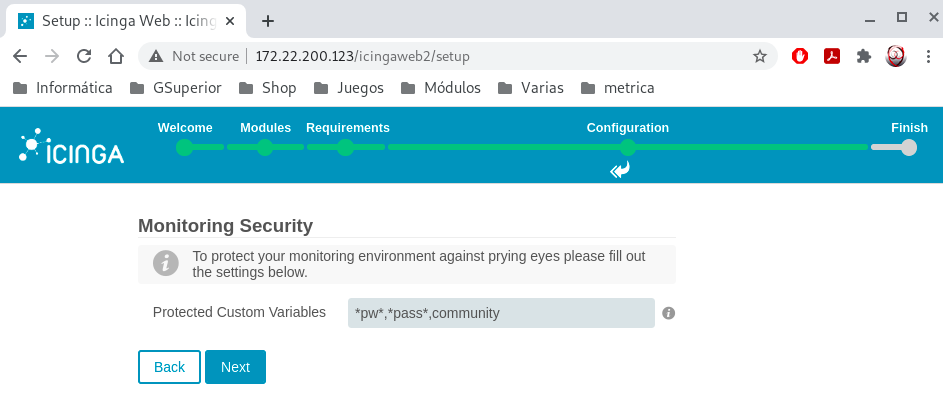
Hacemos una revisión rápida de los datos introducidos anteriormente y confirmamos:

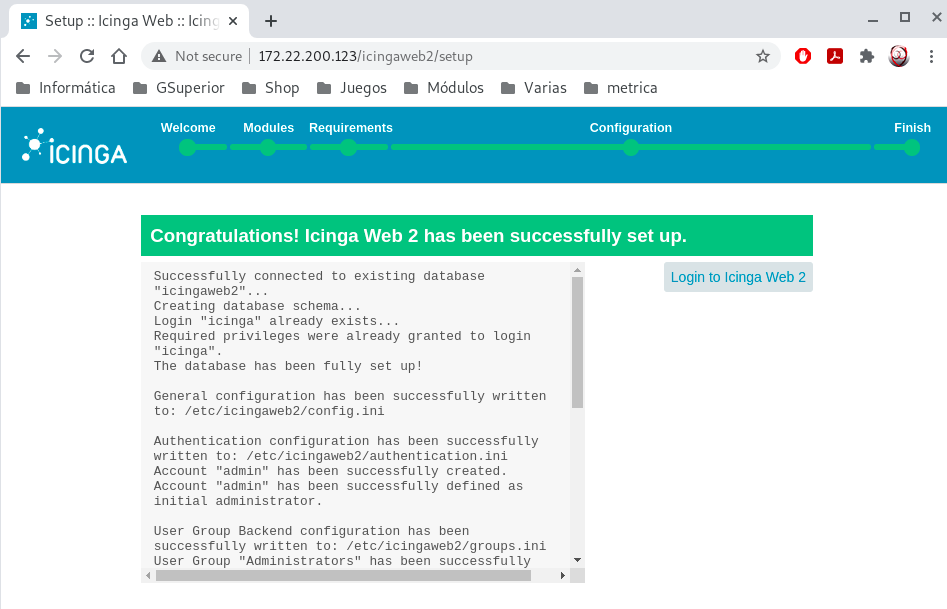
Si llegamos hasta este apartado todo tiene que haber salido correctamente, así que pulsamos en Login to icinga Web 2:
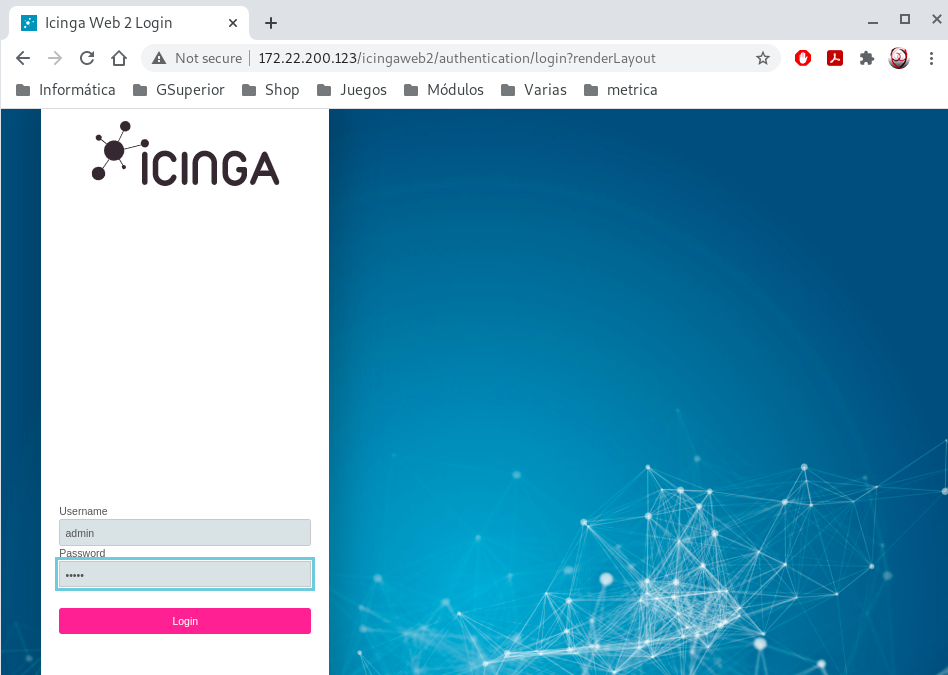
Introducimos el usuario y contraseña que pusimos anteriormente:
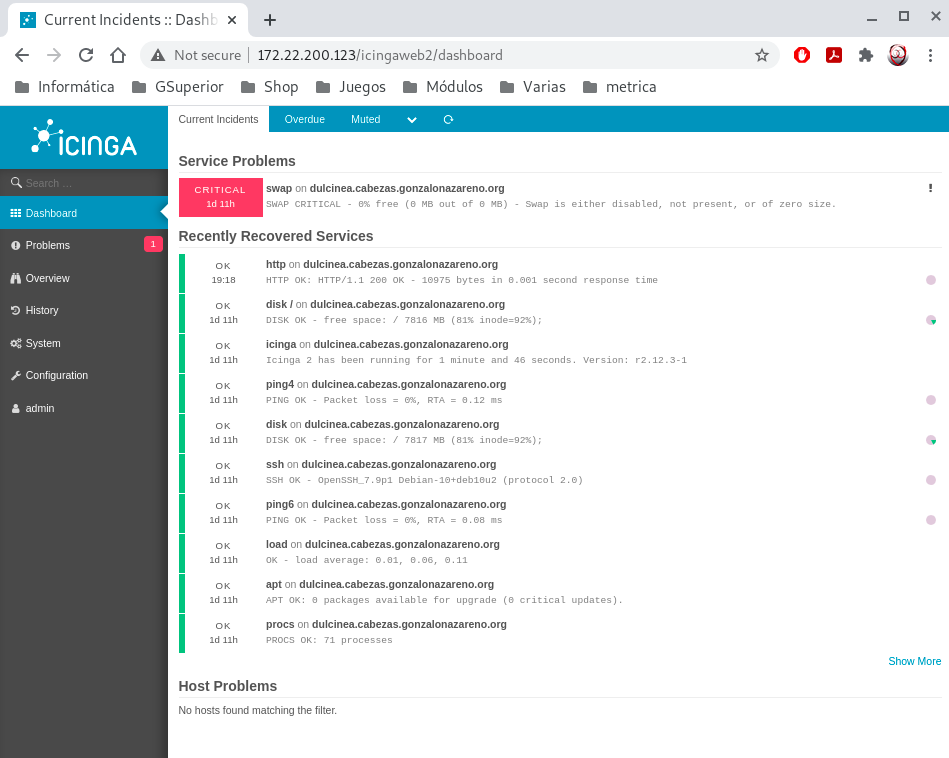
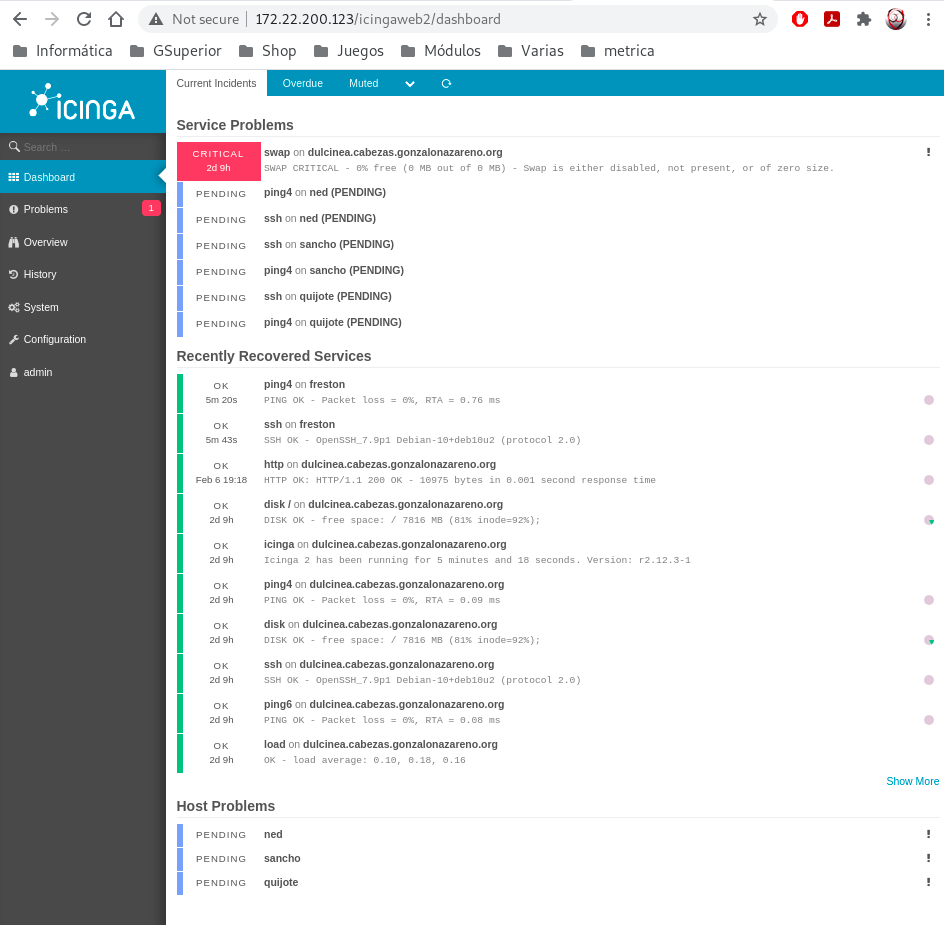
Y ya estaremos en el panel de administración de nuestra máquina dulcinea, que es dónde hemos instalado Icinga2:
Añadir hosts a Icinga
En Icinga existen una serie de ficheros predefinidos que debemos de usar para añadir hosts, servicios, grupos, etc.. todos ellos se encuentran en:
/etc/icinga2/conf.d
Tenemos que diferenciar dos cosas en Icinga, que un host es un equipo que alberga servicios que pueden ser monitorizados. Y que un service es el elemento fundamental a monitorizar, y que por lo general corresponde con algún servicio en ejecución.
Para añadir hosts con información básica, tendremos que irnos al siguiente fichero en dulcinea:
sudo nano /etc/icinga2/conf.d/hosts.conf
Y añadimos lo siguiente:
object Host "freston" {
 import "generic-host"
 address = "10.0.1.9"
 vars.os = "Linux"
}

object Host "sancho" {
 import "generic-host"
 address = "10.0.1.13"
 vars.os = "Linux"
}

object Host "quijote" {
 import "generic-host"
 address = "10.0.2.4"
 vars.os = "Linux"
}

object Host "ned" {
 import "generic-host"
 address = "146.59.196.83"
 vars.os = "Linux"
}
Reiniciamos Icinga:
sudo systemctl restart icinga2
Y comprobamos que se han añadido correctamente al panel web:
Como hemos añadido la plantilla de generic-host a la información del host, si nos vamos a:
sudo nano /etc/icinga2/conf.d/templates.conf
Y vemos la plantilla en sí, vemos que tenemos un comando que es el hostalive, el cual nos hace un ping a la máquina para ver si está funcionando:
template Host "generic-host" {
  max_check_attempts = 3
  check_interval = 1m
  retry_interval = 30s

  check_command = "hostalive"
}
Podemos observar que el equipo se monitorea cada 1 minuto, por ello mientras hemos realizado estos pasos ya tendremos que tener los equipos monitoreados:
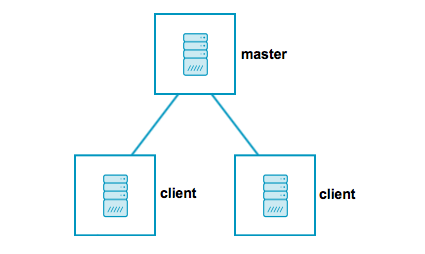
Monitoreo distribuido
Para que otros nodos puedan enviar información a Icinga2 web en nuestra máquina principal, tenemos que hacer una distribución en el monitoreo. Icinga2 distribuye su comunicación entre nodos maestros, satélites y clientes:
-
Nodo maestro: este es el nodo más alto en la estructura, donde normalmente se instala Icinga 2 e Icinga Web 2. Combina las comprobaciones ejecutadas de los nodos secundarios en notificaciones.
-
Nodo satélite: este nodo puede recibir configuraciones para hosts o servicios, etc. desde el nodo maestro. Puede ejecutar las comprobaciones por sí mismo o delegar las comprobaciones a los nodos cliente, y puede ejecutarse incluso si el nodo maestro no está disponible.
-
Nodo cliente: este nodo recibe una ejecución de comando remota desde el nodo principal (maestro o satélite) o ejecuta sus propias comprobaciones configuradas.
Nosotros vamos a resumir la anterior configuración y sólo vamos a usar un nodo maestro y 4 clientes, una cosa así, pero con dos clientes más:
Configuración en dulcinea
Vamos a ejecutar el asistente que nos ayudará a configurar dulcinea como un nodo maestro, para ello:
sudo icinga2 node wizard
Y seleccionamos las siguientes opciones:
Welcome to the Icinga 2 Setup Wizard!

We will guide you through all required configuration details.

Please specify if this is an agent/satellite setup ('n' installs a master setup) [Y/n]: n

Starting the Master setup routine...

Please specify the common name (CN) [dulcinea.cabezas.gonzalonazareno.org]:
Reconfiguring Icinga...
Checking for existing certificates for common name 'dulcinea.cabezas.gonzalonazareno.org'...
Certificates not yet generated. Running 'api setup' now.
Generating master configuration for Icinga 2.
Enabling feature api. Make sure to restart Icinga 2 for these changes to take effect.

Master zone name [master]:

Default global zones: global-templates director-global
Do you want to specify additional global zones? [y/N]: n
Please specify the API bind host/port (optional):
Bind Host []:
Bind Port []:

Do you want to disable the inclusion of the conf.d directory [Y/n]: Y
Disabling the inclusion of the conf.d directory...
Checking if the api-users.conf file exists...

Done.

Now restart your Icinga 2 daemon to finish the installation!
El asistente lo que ha hecho ha sido lo siguiente:
- Habilita la función API, si aún no está habilitada.
- Crea la nueva autoridad de certificación para firmar las solicitudes de firma.
- Genera el nuevo CSR autofirmado.
- Vuelca los elementos de configuración (zonas y
end-points) en/etc/icinga2/zones.conf. - Actualiza el fichero
/etc/icinga2/constants.confconNodeNameyTicketSalt.
Ahora reiniciamos icinga2 para que todo funcione correctamente
sudo systemctl restart icinga2
Instalación Icinga2 y plugins en freston y ned
Este proceso será igual para las dos máquinas, ya que las dos son debian. Actualizamos la máquina e instalamos los paquetes necesarios:
sudo apt update

sudo apt install -y apt-transport-https wget
Descargamos la clave del repositorio de icinga para poder instalar desde su repositorio:
wget https://packages.icinga.com/icinga.key

sudo apt-key add icinga.key
Añadimos los repositorios de Icinga:
sudo su -

echo "deb https://packages.icinga.com/debian icinga-buster main" > /etc/apt/sources.list.d/icinga.list

echo "deb-src https://packages.icinga.com/debian icinga-buster main" > /etc/apt/sources.list.d/icinga.list
Volvemos a actualizar e instalamos Icinga2 y sus plugins:
sudo apt update
sudo apt install icinga2 monitoring-plugins
Reiniciamos Icinga2:
sudo systemctl restart icinga2
Instalación de Icinga2 y plugins en sancho
Entramos como superusuario y ejecutamos lo siguiente:
sudo su -
wget -O - https://packages.icinga.com/icinga.key | apt-key add -
echo "deb http://packages.icinga.com/ubuntu icinga-$(lsb_release -sc) main" | sudo tee /etc/apt/sources.list.d/icinga2.list
echo "deb-src http://packages.icinga.com/ubuntu icinga-$(lsb_release -sc) main" | sudo tee -a /etc/apt/sources.list.d/icinga2.list
Actualizamos la máquina e instalamos:
apt update
apt install -y icinga2 monitoring-plugins
Instalación de Icinga2 y plugins en quijote
Ejecutamos lo siguiente para añadir los repositorios necesarios:
sudo dnf install https://packages.icinga.com/epel/icinga-rpm-release-8-latest.noarch.rpm
sudo dnf install 'dnf-command(config-manager)'
sudo dnf config-manager --set-enabled powertools
sudo dnf install epel-release
E instalamos:
sudo dnf install icinga2 nagios-plugins-all
sudo systemctl enable icinga2
sudo systemctl start icinga2
Generación tickets en servidor
Cuando se ejecuta el asistente de nodo de Icinga2 en las máquinas cliente, este envía una solicitud de firma de certificado al nodo principal. Para firmar automáticamente una solicitud tenemos que generar unos tickets para cada uno de los hosts:
sudo icinga2 pki ticket --cn 'freston.cabezas.gonzalonazareno.org'
9d19baa70fe1a1fb2f0bd29c90ee56b98a7bae18

sudo icinga2 pki ticket --cn 'ned.iesgn02.es'
b7e02cfbbe588508e9e5794e8ae22a78200c3288

sudo icinga2 pki ticket --cn 'sancho.cabezas.gonzalonazareno.org'
86f3429cefdd3a3b281d0bd585bdf7fc38345926

sudo icinga2 pki ticket --cn 'quijote.cabezas.gonzalonazareno.org'
63f9093255b870977bf15fd9485e43ff7a7b6ba3
Y ahora en cada hosts configuraremos el asistente.
Configuración asistente freston
Ejecutamos el asistente en freston e introducimos el ticket generado en el maestro.
sudo icinga2 node wizard

Welcome to the Icinga 2 Setup Wizard!

We will guide you through all required configuration details.

Please specify if this is a satellite/client setup ('n' installs a master setup) [Y/n]: y

Starting the Client/Satellite setup routine...

Please specify the common name (CN) [freston.cabezas.gonzalonazareno.org]:

Please specify the parent endpoint(s) (master or satellite) where this node should connect to:
Master/Satellite Common Name (CN from your master/satellite node): dulcinea.cabezas.gonzalonazareno.org

Do you want to establish a connection to the parent node from this node? [Y/n]: y
Please specify the master/satellite connection information:
Master/Satellite endpoint host (IP address or FQDN): 10.0.1.10
Master/Satellite endpoint port [5665]:

Add more master/satellite endpoints? [y/N]: n
Parent certificate information:

 Subject:     CN = dulcinea.cabezas.gonzalonazareno.org
 Issuer:      CN = Icinga CA
 Valid From:  Feb  9 16:54:31 2021 GMT
 Valid Until: Feb  6 16:54:31 2036 GMT
 Fingerprint: D1 73 BE 37 70 9C AB C2 80 54 92 E8 A0 7E 0F CB 87 E0 DA 6F

Is this information correct? [y/N]: y

Please specify the request ticket generated on your Icinga 2 master (optional).
 (Hint: # icinga2 pki ticket --cn 'freston.cabezas.gonzalonazareno.org'): 9d19baa70fe1a1fb2f0bd29c90ee56b98a7bae18
Please specify the API bind host/port (optional):
Bind Host []:
Bind Port []:

Accept config from parent node? [y/N]: y
Accept commands from parent node? [y/N]: y

Reconfiguring Icinga...
Disabling feature notification. Make sure to restart Icinga 2 for these changes to take effect.
Enabling feature api. Make sure to restart Icinga 2 for these changes to take effect.

Local zone name [freston.cabezas.gonzalonazareno.org]:
Parent zone name [master]:

Default global zones: global-templates director-global
Do you want to specify additional global zones? [y/N]: n

Do you want to disable the inclusion of the conf.d directory [Y/n]: y
Disabling the inclusion of the conf.d directory...

Done.

Now restart your Icinga 2 daemon to finish the installation!
Reiniciamos para que se termine de configurar:
sudo systemctl restart icinga2
Configuración asistente ned
Ejecutamos el asistente en ned e introducimos el ticket generado en el maestro.
sudo icinga2 node wizard

Welcome to the Icinga 2 Setup Wizard!

We will guide you through all required configuration details.

Please specify if this is a satellite/client setup ('n' installs a master setup) [Y/n]: y

Starting the Client/Satellite setup routine...

Please specify the common name (CN) [ned.iesgn02.es]:

Please specify the parent endpoint(s) (master or satellite) where this node should connect to:
Master/Satellite Common Name (CN from your master/satellite node): dulcinea.cabezas.gonzalonazareno.org

Do you want to establish a connection to the parent node from this node? [Y/n]: y
Please specify the master/satellite connection information:
Master/Satellite endpoint host (IP address or FQDN): 172.22.200.123
Master/Satellite endpoint port [5665]:

Add more master/satellite endpoints? [y/N]: n
Parent certificate information:

 Subject:     CN = dulcinea.cabezas.gonzalonazareno.org
 Issuer:      CN = Icinga CA
 Valid From:  Feb  9 16:54:31 2021 GMT
 Valid Until: Feb  6 16:54:31 2036 GMT
 Fingerprint: D1 73 BE 37 70 9C AB C2 80 54 92 E8 A0 7E 0F CB 87 E0 DA 6F

Is this information correct? [y/N]: y

Please specify the request ticket generated on your Icinga 2 master (optional).
 (Hint: # icinga2 pki ticket --cn 'ned.iesgn02.es'): b7e02cfbbe588508e9e5794e8ae22a78200c3288
Please specify the API bind host/port (optional):
Bind Host []:
Bind Port []:

Accept config from parent node? [y/N]: y
Accept commands from parent node? [y/N]: y

Reconfiguring Icinga...
Disabling feature notification. Make sure to restart Icinga 2 for these changes to take effect.
Enabling feature api. Make sure to restart Icinga 2 for these changes to take effect.

Local zone name [ned.iesgn02.es]:
Parent zone name [master]:

Default global zones: global-templates director-global
Do you want to specify additional global zones? [y/N]: n

Do you want to disable the inclusion of the conf.d directory [Y/n]: y
Disabling the inclusion of the conf.d directory...

Done.

Now restart your Icinga 2 daemon to finish the installation!
Reiniciamos para que se termine de configurar:
sudo systemctl restart icinga2
Configuración asistente sancho
Ejecutamos el asistente en sancho e introducimos el ticket generado en el maestro.
sudo icinga2 node wizard

Welcome to the Icinga 2 Setup Wizard!

We will guide you through all required configuration details.

Please specify if this is an agent/satellite setup ('n' installs a master setup) [Y/n]: y

Starting the Agent/Satellite setup routine...

Please specify the common name (CN) [sancho.cabezas.gonzalonazareno.org]:

Please specify the parent endpoint(s) (master or satellite) where this node should connect to:
Master/Satellite Common Name (CN from your master/satellite node): dulcinea.cabezas.gonzalonazareno.org

Do you want to establish a connection to the parent node from this node? [Y/n]: y
Please specify the master/satellite connection information:
Master/Satellite endpoint host (IP address or FQDN): 10.0.1.10
Master/Satellite endpoint port [5665]:

Add more master/satellite endpoints? [y/N]: n
Parent certificate information:

 Version:             3
 Subject:             CN = dulcinea.cabezas.gonzalonazareno.org
 Issuer:              CN = Icinga CA
 Valid From:          Feb  9 16:54:31 2021 GMT
 Valid Until:         Feb  6 16:54:31 2036 GMT
 Serial:              4a:02:0d:05:3d:08:67:c0:b8:92:aa:c0:cb:de:c1:99:d4:eb:e5:0a

 Signature Algorithm: sha256WithRSAEncryption
 Subject Alt Names:   dulcinea.cabezas.gonzalonazareno.org
 Fingerprint:         EA E6 41 A7 BA 1B 8A 4C 48 43 47 B2 90 D1 1C 63 44 3D 14 F7 D7 88 31 7F 9F E8 09 DD 36 E4 45 7E

Is this information correct? [y/N]: y

Please specify the request ticket generated on your Icinga 2 master (optional).
 (Hint: # icinga2 pki ticket --cn 'sancho.cabezas.gonzalonazareno.org'): 86f3429cefdd3a3b281d0bd585bdf7fc38345926
Please specify the API bind host/port (optional):
Bind Host []:
Bind Port []:

Accept config from parent node? [y/N]: y
Accept commands from parent node? [y/N]: y

Reconfiguring Icinga...

Local zone name [sancho.cabezas.gonzalonazareno.org]:
Parent zone name [master]:

Default global zones: global-templates director-global
Do you want to specify additional global zones? [y/N]: n

Do you want to disable the inclusion of the conf.d directory [Y/n]: y
Disabling the inclusion of the conf.d directory...

Done.

Now restart your Icinga 2 daemon to finish the installation!
Reiniciamos para que se termine de configurar:
sudo systemctl restart icinga2
Configuración asistente quijote
Ejecutamos el asistente en quijote e introducimos el ticket generado en el maestro.
sudo icinga2 node wizard

Welcome to the Icinga 2 Setup Wizard!

We will guide you through all required configuration details.

Please specify if this is an agent/satellite setup ('n' installs a master setup) [Y/n]: y

Starting the Agent/Satellite setup routine...

Please specify the common name (CN) [quijote.cabezas.gonzalonazareno.org]:

Please specify the parent endpoint(s) (master or satellite) where this node should connect to:
Master/Satellite Common Name (CN from your master/satellite node): dulcinea.cabezas.gonzalonazareno.org

Do you want to establish a connection to the parent node from this node? [Y/n]: y
Please specify the master/satellite connection information:
Master/Satellite endpoint host (IP address or FQDN): 10.0.2.5
Master/Satellite endpoint port [5665]:

Add more master/satellite endpoints? [y/N]: n
Parent certificate information:

 Version:             3
 Subject:             CN = dulcinea.cabezas.gonzalonazareno.org
 Issuer:              CN = Icinga CA
 Valid From:          Feb  9 16:54:31 2021 GMT
 Valid Until:         Feb  6 16:54:31 2036 GMT
 Serial:              4a:02:0d:05:3d:08:67:c0:b8:92:aa:c0:cb:de:c1:99:d4:eb:e5:0a

 Signature Algorithm: sha256WithRSAEncryption
 Subject Alt Names:   dulcinea.cabezas.gonzalonazareno.org
 Fingerprint:         EA E6 41 A7 BA 1B 8A 4C 48 43 47 B2 90 D1 1C 63 44 3D 14 F7 D7 88 31 7F 9F E8 09 DD 36 E4 45 7E

Is this information correct? [y/N]: y

Please specify the request ticket generated on your Icinga 2 master (optional).
 (Hint: # icinga2 pki ticket --cn 'quijote.cabezas.gonzalonazareno.org'): 63f9093255b870977bf15fd9485e43ff7a7b6ba3
Please specify the API bind host/port (optional):
Bind Host []:
Bind Port []:

Accept config from parent node? [y/N]: y
Accept commands from parent node? [y/N]: y

Reconfiguring Icinga...

Local zone name [quijote.cabezas.gonzalonazareno.org]:
Parent zone name [master]:

Default global zones: global-templates director-global
Do you want to specify additional global zones? [y/N]: n

Do you want to disable the inclusion of the conf.d directory [Y/n]: y
Disabling the inclusion of the conf.d directory...

Done.

Now restart your Icinga 2 daemon to finish the installation!
Reiniciamos para que se termine de configurar:
sudo systemctl restart icinga2
Configuración de clientes en servidor maestro
Vamos a crear la siguiente estructura para crear un archivo .conf por cada una de nuestras máquinas:
sudo mkdir -p /etc/icinga2/zones.d/master
Y ahora crearemos un archivo de configuración para nuestras máquinas.
freston
sudo nano /etc/icinga2/zones.d/master/freston.cabezas.gonzalonazareno.org.conf
Y añadimos los servicios a supervisar:
// Endpoints & Zones
object Endpoint "freston.cabezas.gonzalonazareno.org" {
}

object Zone "freston.cabezas.gonzalonazareno.org" {
     endpoints = [ "freston.cabezas.gonzalonazareno.org" ]
     parent = "master"
}

// Host Objects
object Host "freston.cabezas.gonzalonazareno.org" {
    check_command = "hostalive"
    address = "10.0.1.9"
    vars.client_endpoint = name

// Custom Optional check - START
    vars.local_disks["/ Filesystem"] = {
       disk_partitions = "/"
  }

   vars.local_dns_port["dns"] ={
       tcp_port = "53"
       service_name = "DNS_Check"
       port_number = "Port 53"
  }

// Custom Optional Check - END
}
ned
sudo nano /etc/icinga2/zones.d/master/ned.iesgn02.es.conf
Y añadimos los servicios a supervisar:
// Endpoints & Zones
object Endpoint "ned.iesgn02.es" {
}

object Zone "ned.iesgn02.es" {
     endpoints = [ "ned.iesgn02.es" ]
     parent = "master"
}

// Host Objects
object Host "ned.iesgn02.es" {
    check_command = "hostalive"
    address = "172.23.0.122"
    vars.client_endpoint = name

// Custom Optional check - START
    vars.local_disks["/ Filesystem"] = {
       disk_partitions = "/"
  }

   vars.local_http_vhosts ["http"] = {
       http_uri = "/"
  }

   vars.local_http_vhosts ["nextcloud"] = {
       http_uri = "/cloud"
  }

// Custom Optional Check - END
}
sancho
sudo nano /etc/icinga2/zones.d/master/sancho.cabezas.gonzalonazareno.org.conf
Y añadimos los servicios a supervisar:
// Endpoints & Zones
object Endpoint "sancho.cabezas.gonzalonazareno.org" {
}

object Zone "sancho.cabezas.gonzalonazareno.org" {
     endpoints = [ "sancho.cabezas.gonzalonazareno.org" ]
     parent = "master"
}

// Host Objects
object Host "sancho.cabezas.gonzalonazareno.org" {
    check_command = "hostalive"
    address = "10.0.1.13"
    vars.client_endpoint = name
    vars.mysql = true
// Custom Optional check - START
    vars.local_disks["/ Filesystem"] = {
       disk_partitions = "/"
  }

// Custom Optional Check - END
}
quijote
sudo nano /etc/icinga2/zones.d/master/quijote.cabezas.gonzalonazareno.org.conf
Y añadimos los servicios a supervisar:
// Endpoints & Zones
object Endpoint "quijote.cabezas.gonzalonazareno.org" {
}

object Zone "quijote.cabezas.gonzalonazareno.org" {
     endpoints = [ "quijote.cabezas.gonzalonazareno.org" ]
     parent = "master"
}

// Host Objects
object Host "quijote.cabezas.gonzalonazareno.org" {
    check_command = "hostalive"
    address = "10.0.2.4"
    vars.client_endpoint = name

// Custom Optional check - START
    vars.local_disks["/ Filesystem"] = {
       disk_partitions = "/"
  }

 vars.local_http_vhosts ["http"] = {
       http_uri = "/"
  }

// Custom Optional Check - END
}
Servicios básicos para monitorear
Dado que hemos deshabilitado la inclusión del directorio conf.d de incinga, tenemos que agregar los servicios que se van a monitorear, para ello:
sudo nano /etc/icinga2/zones.d/master/services.conf
Y añadimos lo siguiente:
// Ping Check
apply Service "Ping" {
  check_command = "ping4"
  assign where host.address // check is executed on the master node
}

// System Load
apply Service "System Load" {
  check_command = "load"
  command_endpoint = host.vars.client_endpoint // Check executed on client node
  assign where host.vars.client_endpoint
}

// System Process Count
apply Service "Process" {
  check_command = "procs"
  command_endpoint = host.vars.client_endpoint
  assign where host.vars.client_endpoint
}

// Logged in User Count
apply Service "Users" {
  check_command = "users"
  command_endpoint = host.vars.client_endpoint
  assign where host.vars.client_endpoint
}

// Disk Usage Check
apply Service "Disk" {
  check_command = "disk"
  command_endpoint = host.vars.client_endpoint
  assign where host.vars.client_endpoint
}

// Disk Usage Check for Specific Partition
apply Service for (disk => config in host.vars.local_disks) {
  check_command = "disk"
  vars += config
  command_endpoint = host.vars.client_endpoint
  assign where host.vars.client_endpoint
}

// System Swap Check
apply Service "SWAP" {
  check_command = "swap"
  command_endpoint = host.vars.client_endpoint
  assign where host.vars.client_endpoint
}

// SSH Service Check
apply Service "SSH Service" {
  check_command = "ssh"
  command_endpoint = host.vars.client_endpoint
  assign where host.vars.client_endpoint

}

// FTP Service Check
//apply Service "FTP Service" {
//  check_command = "ftp"
//  command_endpoint = host.vars.client_endpoint
//  assign where host.vars.client_endpoint

//

// Icinga 2 Service Check
apply Service "Icinga2 Service" {
  check_command = "icinga"
  command_endpoint = host.vars.client_endpoint
  assign where host.vars.client_endpoint
}

// Apache VirtualHost Check
apply Service for (http_vhost => config in host.vars.local_http_vhosts) {
  check_command = "http"
  vars += config
  command_endpoint = host.vars.client_endpoint
  assign where host.vars.client_endpoint
}

// TCP Port Check
apply Service for (tcp_port => config in host.vars.local_tcp_port) {
  check_command = "tcp"
  vars += config
  display_name = + vars.service_name + " - " + vars.port_number
  command_endpoint = host.vars.client_endpoint
  assign where host.vars.client_endpoint
}

// DNS Port Check
apply Service for (dns_port => config in host.vars.local_dns_port) {
  check_command = "dns"
  vars += config
  display_name = + vars.service_name + " - " + vars.port_number
  command_endpoint = host.vars.client_endpoint
  assign where host.vars.client_endpoint
}

// MySQL Port Check
apply Service "mysql-test" {
  display_name = "MySQL Test"

  check_command = "mysql"

  vars.mysql_database = "nagios"

  vars.mysql_username = "nagios"

  vars.mysql_password = "nagios"

assign where host.vars.mysql == true
}
Validamos la configuración:
sudo icinga2 daemon -C
Reiniciamos el servicio:
sudo systemctl restart icinga2
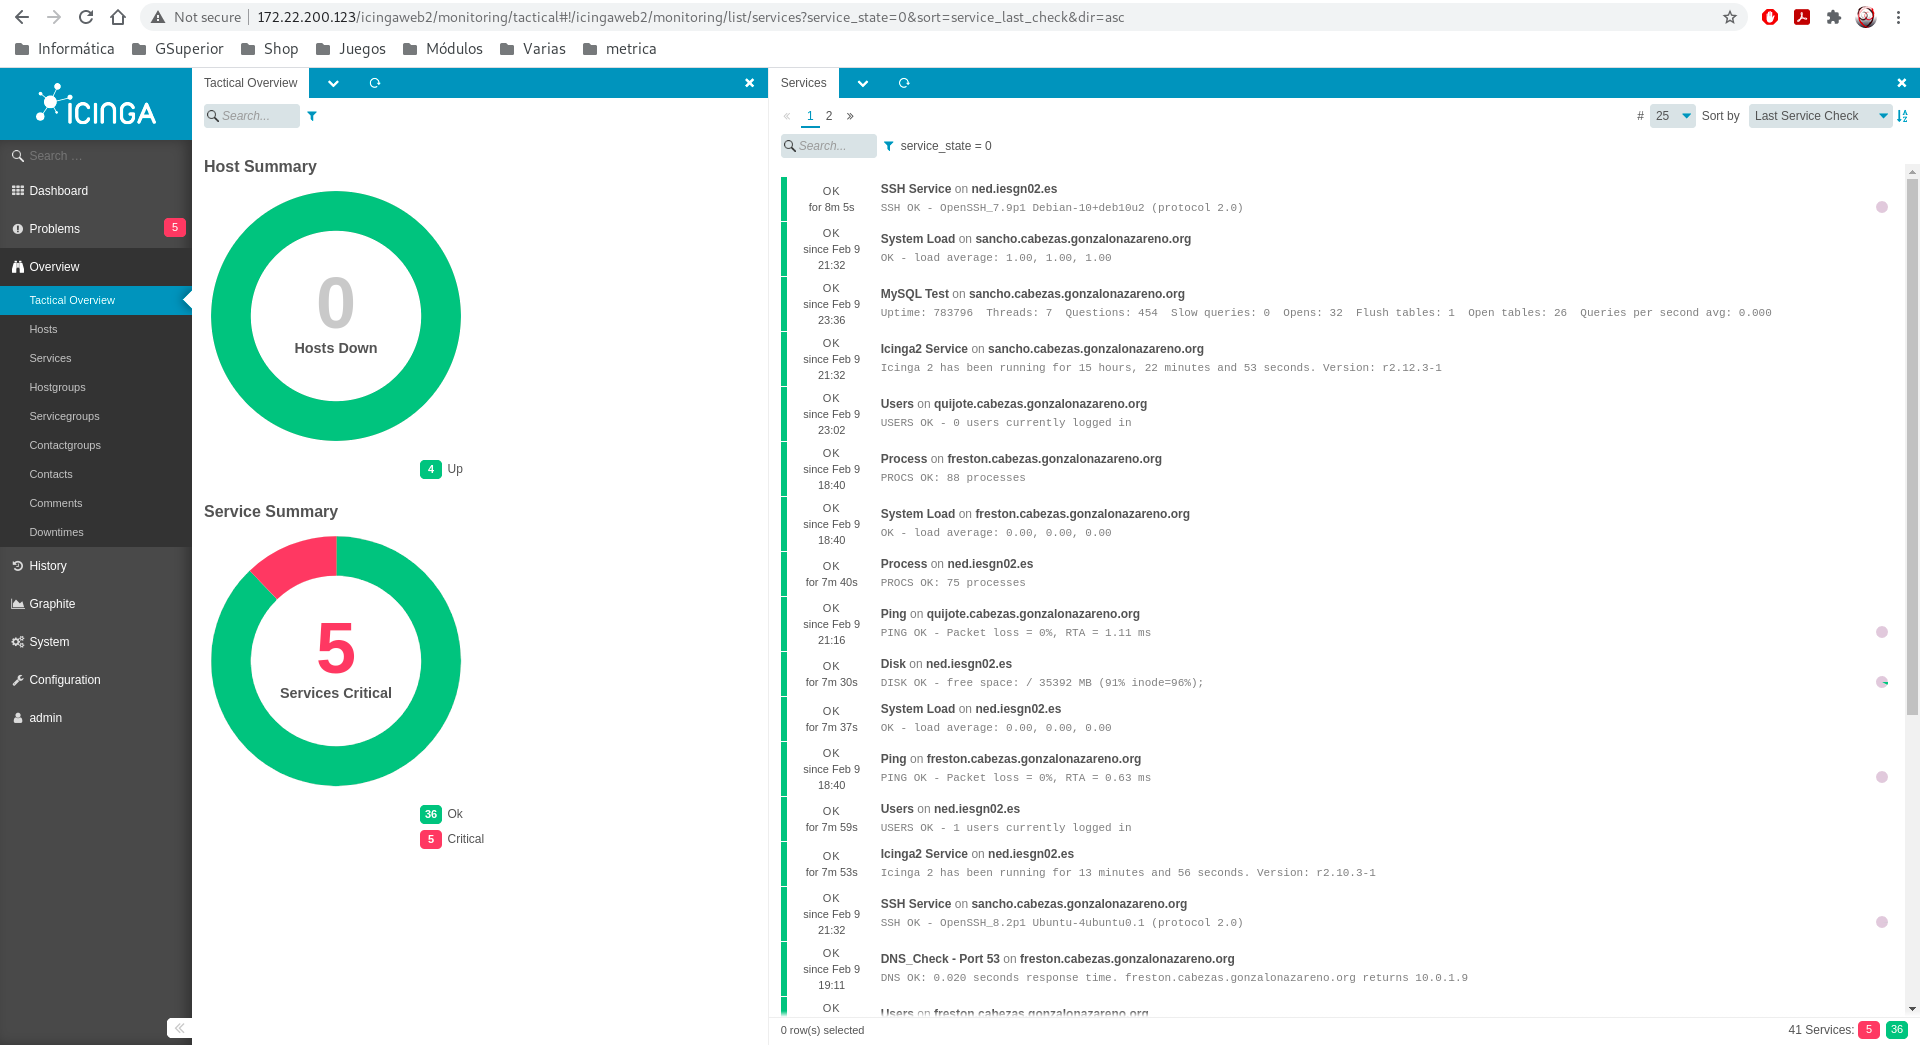
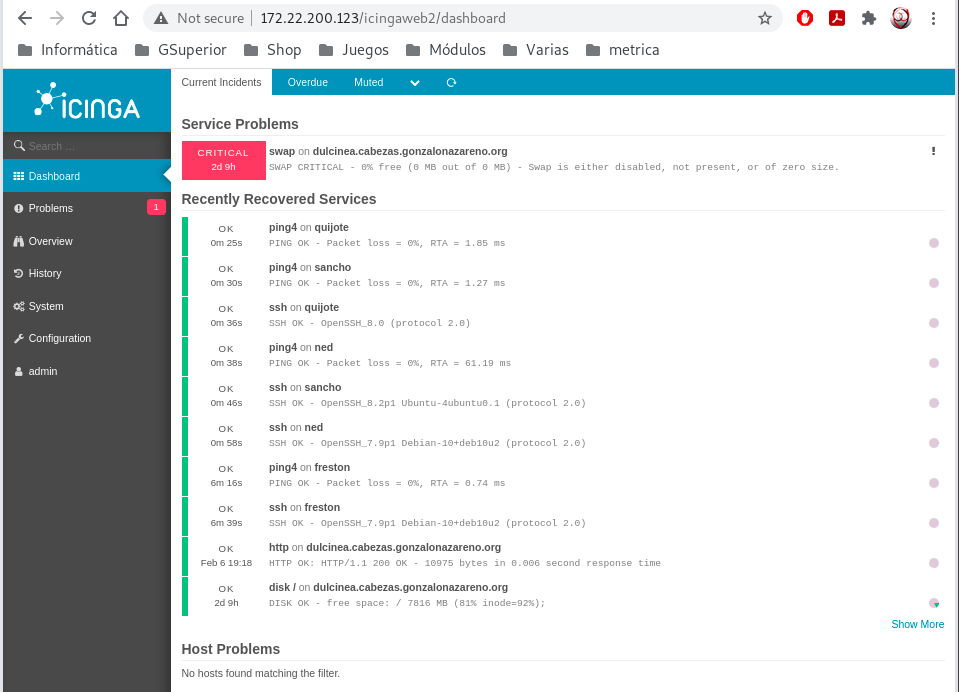
Y comprobamos que podemos visualizar los servicios: